Wax Woes? Simple Tricks to Remove Wax Stains from Your Carpet!

A wax spill on your carpet can feel like a disaster, especially if it hardens and sticks to the fibers. Whether it’s from candles, crayons, or melted wax decorations, these stains can be tricky to handle. But don’t worry! With a few simple techniques, you can safely remove wax stains and restore your carpet’s appearance. This guide walks you through easy steps to banish wax spills effectively.

Why Wax Stains Are Challenging

Wax hardens quickly and clings to carpet fibers, making it difficult to remove without the right tools and techniques. Improper cleaning methods can spread the wax further or damage the carpet. However, with proper Carpet Cleaning, you can eliminate the mess and keep your carpet looking spotless.

Step-by-Step Guide to Remove Wax Stains

1. Let the Wax Harden

Resist the urge to clean up the wax immediately. Allowing it to harden makes it easier to remove without smearing. You can speed up this process by placing an ice pack or a bag of frozen vegetables over the wax.

2. Scrape Off Excess Wax

  • Use a dull knife or spoon to gently scrape off as much hardened wax as possible.
  • Be careful not to damage the carpet fibers during this step.

3. Apply Heat to Melt the Remaining Wax

Heat is key to lifting wax stains from your carpet:

  • Place a plain paper bag, a piece of brown paper, or a clean white cloth over the wax.
  • Set your iron to a low or medium heat setting (no steam).
  • Gently press the iron onto the paper for a few seconds. The heat will melt the wax, which will transfer onto the paper.
  • Repeat with a fresh piece of paper or cloth until all the wax is removed.

4. Clean the Stained Area

Wax can leave an oily residue, so it’s essential to clean the area thoroughly:

  • Mix one tablespoon of dish soap with two cups of warm water.
  • Dampen a clean cloth with the solution and blot the stained area.
  • Avoid scrubbing, as this can spread the residue further.

5. Rinse and Dry

  • Use a damp cloth soaked in clean water to rinse away any soap residue.
  • Blot the area with a dry towel to absorb excess moisture.
  • Allow the carpet to air dry completely or use a fan to speed up the drying process.

Additional Methods for Tough Wax Stains

If the above steps don’t fully remove the wax, try these alternatives:

  • Rubbing Alcohol:
    • Dab a small amount of rubbing alcohol onto a clean cloth and gently blot the stained area to break down oily residue.
    • Test this method in an inconspicuous area first to ensure it won’t damage your carpet.
  • Vacuuming:
    • After scraping and heating the wax, vacuum the area to lift any remaining particles from the carpet fibers.

Preventing Wax Stains on Carpets

  1. Use Candle Holders: Always place candles on a stable, heat-resistant surface to prevent accidental spills.
  2. Avoid High-Traffic Areas: Keep wax-based decorations away from areas where they’re likely to be knocked over.
  3. Clean Spills Quickly: Address wax spills as soon as you notice them to avoid long-term damage.

When to Call the Professionals

For large spills, deeply embedded wax, or delicate carpets, it’s best to seek expert help. Professional carpet cleaning services use advanced tools and techniques to safely remove wax stains without causing damage.

Why Quick Action Matters

Wax stains might seem stubborn, but quick and proper cleaning can make all the difference. Acting promptly ensures the wax doesn’t settle deeply into the carpet fibers, saving you time and effort during the cleaning process.

Conclusion

Wax stains may look like a challenge, but they’re far from impossible to handle. With the right approach and a little patience, you can remove wax spills and restore your carpet’s beauty. If you’re unsure or dealing with a large stain, professional help is always a reliable option. Follow these simple steps, and your carpet will be wax-free and fresh in no time.

Published on: February 15, 2025

Old furniture may seem like a comforting addition to your home, but it can also pose serious health and hygiene risks. Over time, upholstery collects dirt, bacteria, allergens, and other harmful particles that not only affect your furniture but also the quality of the air in your home. 

The Health Risks of Dirty Furniture Upholstery

Furniture upholstery can trap various contaminants that are harmful to your health. When these contaminants build up over time, they can contribute to respiratory problems, allergies, and other health issues. Here are the most common hygiene hazards that old upholstery can harbor:

  1. Dust and Allergens
    Old upholstery traps dust, pet dander, and pollen, which are major contributors to allergies. Every time you sit or lie on the couch, these particles are released back into the air, triggering sneezing, coughing, and other allergy symptoms.
  2. Bacteria and Germs
    Spills, sweat, and human contact allow bacteria and germs to settle in fabric fibers. If not cleaned regularly, these germs can multiply and contribute to skin infections or other health problems. Germs from pets, food, or even hands can transfer easily onto your skin, increasing the risk of illnesses.
  3. Mold and Mildew Growth
    Moisture from spills or humidity can lead to mold and mildew growth in your furniture upholstery. These fungi can cause serious respiratory issues when inhaled, leading to symptoms such as wheezing, coughing, and nasal congestion. Mold can also create an unpleasant musty odor in your home.
  4. Dust Mites
    Dust mites are microscopic creatures that thrive in warm, moist environments. Your old couch is a perfect breeding ground for these pests. Dust mites feed on dead skin cells and produce waste that can trigger asthma, eczema, and other respiratory conditions.

The Importance of Regular Couch Cleaning

Given the health hazards associated with old furniture upholstery, regular couch cleaning is essential for maintaining a healthy environment in your home. Cleaning removes the dirt, dust, bacteria, and other contaminants that build up over time, ensuring that your furniture remains fresh and safe to use. Here’s how cleaning improves the hygiene of your furniture:

  • Removes Dust and Allergens
    Cleaning upholstery helps remove dust, pollen, and pet dander from fabric fibers, providing relief for allergy sufferers and improving indoor air quality.
  • Eliminates Bacteria and Germs
    Deep cleaning methods, such as steam cleaning, sanitize your furniture, killing harmful bacteria and preventing the spread of germs in your home.
  • Prevents Mold and Mildew
    Professional cleaning methods also target mold and mildew growth, reducing moisture and preventing fungi from developing in your furniture.
  • Improves Overall Health
    Regular cleaning of your upholstery leads to cleaner air, fewer allergens, and a healthier home environment for you and your family.

Why DIY Cleaning Isn’t Enough

While vacuuming and spot cleaning can help maintain the surface cleanliness of your couch, professional cleaning provides a deeper, more thorough clean that’s necessary to eliminate harmful bacteria and allergens. Here are some reasons why DIY cleaning isn’t always sufficient:

  • Inadequate Equipment
    Household vacuums and cleaning products may not be strong enough to remove deeply embedded dirt and allergens from upholstery fibers. Professional cleaning services use specialized equipment that’s designed to thoroughly clean and sanitize your couch.
  • Hidden Contaminants
    A lot of dirt, dust, and bacteria are hidden deep within the fabric of your couch. DIY cleaning methods often miss these areas, allowing contaminants to remain and continue to pose health risks.
  • Risk of Damage
    Improper cleaning methods, such as using the wrong products or too much water, can damage your couch’s fabric or cause it to lose its shape. Professional cleaners are experienced in handling different upholstery materials and can ensure that your couch is cleaned safely.

How Often Should You Clean Your Couch?

The frequency of cleaning depends on factors such as usage, household environment, and the presence of pets or young children. Here are some general guidelines:

  • Every 6–12 months – For homes without pets or heavy traffic, a cleaning every 6–12 months is usually sufficient.
  • Every 3–6 months – For households with pets or children, consider scheduling cleaning every 3–6 months to keep allergens and bacteria at bay.
  • Immediately after spills or accidents – It’s important to clean any spills or accidents immediately to prevent stains and bacteria buildup.

Benefits of Professional Couch Cleaning

Hiring a professional cleaning service ensures that your furniture receives the best possible care. Here are some benefits of using a professional service:

  • Thorough Cleaning – Professionals use advanced techniques and equipment to clean every inch of your couch, leaving no harmful contaminants behind.
  • Time-Saving – Professional cleaners save you time and effort, allowing you to relax while they take care of the dirty work.
  • Long-Term Preservation – Regular professional cleaning can extend the lifespan of your couch by keeping it in optimal condition and preventing premature wear and tear.

If you’re in need of a professional service, consider Couch Cleaning in Adelaide for a fresh and hygienic home environment.

Conclusion

Old furniture upholstery can be a breeding ground for dust, allergens, bacteria, and mold, which can all have a negative impact on your health. Regular cleaning helps eliminate these hygiene hazards, ensuring that your living space remains clean, fresh, and healthy. Don’t ignore the hidden risks in your upholstery – invest in professional cleaning to protect your family’s health and maintain a comfortable home.

Published on: February 13, 2025

Roller blinds are a popular choice for homes and offices due to their sleek appearance, versatility, and ease of use. However, over time, they collect dust, dirt, and stains, which can diminish their look and functionality. Cleaning roller blinds might seem like a daunting task, but with the right techniques and tools, you can restore their shine quickly and effectively.

Why Cleaning Roller Blinds Is Important

Regular cleaning of roller blinds offers numerous benefits:

  1. Enhanced Appearance: Clean blinds maintain their stylish look, complementing your decor.
  2. Improved Air Quality: Removing dust and allergens promotes a healthier indoor environment.
  3. Prolonged Lifespan: Regular maintenance prevents wear and tear, extending the life of your blinds.
  4. Cost Savings: Proper care reduces the need for replacements or professional cleaning services.

Quick and Easy Cleaning Hacks for Roller Blinds

1. Dusting: The First Line of Defense

Dusting is the simplest way to keep your roller blinds clean and free of buildup.

  • How to Do It:
    1. Fully extend the blinds to expose the entire surface.
    2. Use a microfiber cloth, feather duster, or vacuum cleaner with a brush attachment to remove dust.
    3. Work from the top down to avoid redistributing dust onto already-clean areas.
  • Pro Tip: Dust your blinds weekly to minimize the accumulation of dirt and allergens.

2. Spot Cleaning for Stains and Marks

Stains or marks on roller blinds can occur due to accidental spills or greasy fingerprints. Spot cleaning is an effective way to address these without deep cleaning.

  • How to Do It:
    1. Mix a small amount of mild detergent with warm water to create a cleaning solution.
    2. Dip a clean sponge or cloth into the solution, wring out excess water, and gently blot the stained area.
    3. Rinse the spot with a damp cloth to remove any soap residue.
    4. Allow the area to air dry completely.
  • Pro Tip: Avoid using abrasive scrubbers or harsh chemicals, as these can damage the fabric or finish of the blinds.

3. Deep Cleaning for Heavily Soiled Blinds

If your roller blinds haven’t been cleaned for a while or are heavily soiled, a more thorough cleaning is required.

  • How to Do It:
    1. Remove the blinds from the brackets carefully.
    2. Fill a bathtub or large basin with warm water and a mild detergent.
    3. Submerge the blinds in the water and let them soak for 15–20 minutes to loosen dirt.
    4. Use a soft sponge to gently scrub both sides of the blinds.
    5. Rinse thoroughly with clean water and let the blinds air dry completely before rehanging.
  • Pro Tip: For fabric blinds, avoid submerging them in water and opt for spot cleaning or professional help instead.

4. Use a Steam Cleaner for a Quick Refresh

Steam cleaning is an efficient, chemical-free way to refresh your roller blinds and eliminate dirt, grease, and odors.

  • How to Do It:
    1. Use a handheld steam cleaner with a fabric-safe attachment.
    2. Hold the steamer 6–8 inches away from the blinds and move it in vertical strokes.
    3. Wipe away loosened dirt with a clean microfiber cloth.
  • Pro Tip: Steam cleaning is especially useful for blinds in kitchens or bathrooms where grease and moisture are common.

5. Preventative Maintenance for Long-Lasting Cleanliness

Keeping your blinds clean doesn’t have to be a chore if you incorporate simple preventative measures into your routine.

  • How to Do It:
    • Vacuum or dust the surrounding window sills and frames regularly to reduce dirt transfer.
    • Avoid touching the blinds with greasy or dirty hands.
    • Close windows during windy weather to minimize dust buildup on the blinds.
  • Pro Tip: For stubborn stains or delicate blinds, consider hiring curtain cleaning to ensure safe and effective results.

Tips for Maintaining Roller Blinds

  1. Regular Dusting: Weekly dusting prevents dirt from embedding into the fabric.
  2. Spot Treat Quickly: Address stains as soon as they appear to avoid permanent marks.
  3. Inspect Mechanisms: Check the roller and chain system periodically to ensure smooth operation.
  4. Rotate or Switch Blinds: If you have multiple blinds, rotate them between rooms to ensure even wear and sun exposure.

When to Seek Professional Cleaning Services

While DIY methods work for regular maintenance, there are situations where professional assistance is essential:

  • Stubborn Stains or Odors: Professionals have specialized tools and techniques to tackle tough stains.
  • Delicate or High-End Blinds: Fabric or motorized blinds may require expert care to avoid damage.
  • Heavy Soiling: If blinds are heavily soiled or have not been cleaned in years, professional cleaning ensures a thorough refresh.

Benefits of Clean Roller Blinds

  1. Aesthetic Appeal: Clean blinds enhance the look of any space, keeping your home or office polished and inviting.
  2. Healthier Environment: Removing dust, allergens, and odors creates a fresher and healthier living or working environment.
  3. Long-Term Savings: Regular maintenance prolongs the lifespan of your blinds, reducing replacement costs.

Conclusion

Cleaning roller blinds doesn’t have to be complicated or expensive. With these quick and easy cleaning hacks, you can keep your blinds looking as good as new while maintaining a clean and healthy home. From regular dusting to deep cleaning, these methods are simple, effective, and budget-friendly.

For delicate or heavily soiled blinds, seeking professional help from professional curtain cleaning near me ensures expert care and long-lasting results. By incorporating these tips into your routine, you can enjoy spotless roller blinds that add style and functionality to your space.

Published on: February 12, 2025

When floodwaters infiltrate your home, one of the first things you might think to do is to pull out your household fans and dehumidifiers to dry out the affected areas. While these appliances can certainly help in some situations, relying solely on them for flood damage drying can be a huge mistake. In reality, household fans and dehumidifiers often fall short when it comes to addressing the complex drying needs after a flood. Here’s why you should think twice about using them as your go-to tools for drying out your home and the reasons professional flood damage restoration is essential.

Why Household Fans Aren’t Enough for Drying Out After a Flood

1. Limited Airflow and Circulation

Household fans, while useful for circulating air, are often not powerful enough to dry large areas affected by flood damage. Floodwaters tend to seep into walls, floors, and hidden spaces, where fans struggle to provide adequate airflow. Even when placed in open spaces, household fans can only push air across the surface, leaving moisture trapped in more porous materials like insulation, wood, and drywall.

Professional water damage restoration teams use high-powered air movers and industrial-grade dehumidifiers that are designed to provide much stronger airflow. These tools can penetrate deeper into the materials, ensuring that water is removed from all affected surfaces, including hidden spaces.

2. Inability to Remove Moisture from Deep Within Structures

Flood damage doesn’t just affect the surface. Water can saturate structural materials such as wood beams, drywall, insulation, and carpets. Household fans are not designed to address this issue, as they focus only on surface moisture. Even if the surface looks dry, moisture can remain trapped deep inside, leading to long-term problems such as mold growth, rotting wood, and structural instability.

Specialized drying equipment used by professionals in restoration is designed to extract moisture from deep within the materials. Techniques like controlled heat drying and the use of dehumidifiers can accelerate the evaporation process, reducing the chances of mold and mildew growth.

3. Risk of Mold Growth and Health Hazards

If flood-damaged areas are not dried thoroughly and quickly, mold growth can become a significant concern. Mold can begin growing within 24 to 48 hours in humid environments, and household fans may not remove enough moisture to prevent this. While fans help circulate air, they don’t lower the humidity levels effectively, which is essential to stopping mold from forming.

Professionals use dehumidifiers in conjunction with air movers to maintain an optimal drying environment, preventing mold from taking root. This step is essential for protecting your home’s structural integrity and your health, as mold can lead to respiratory problems, allergies, and other health issues.

4. Ineffective for Large Flooded Areas

Household fans are typically designed to address small, localized moisture problems, such as drying damp rooms or items. However, in the case of a flood, the damage is often much more widespread. Even with multiple fans running, it can take a long time to dry out the entire affected area, especially if you’re dealing with large rooms, multiple floors, or floodwater that has spread throughout the home.

Flood damage restoration professionals have access to heavy-duty drying equipment that can handle large areas at once. Industrial-grade dehumidifiers and powerful air movers can work in tandem to dry out entire homes quickly and efficiently, often within just a few days.

DIY Solutions for Flood Drying Before Professionals Arrive

While waiting for professionals, there are a few DIY steps you can take to help minimize the damage and accelerate the drying process:

1. Remove Standing Water Immediately

The first step after flooding is to remove as much water as possible. Use a wet/dry vacuum, sump pump, or towels to absorb and remove standing water. The faster you remove the water, the less likely it is to seep deeper into your floors and walls.

2. Open Windows and Doors for Ventilation

Increase airflow by opening windows and doors, which will allow fresh air to circulate and help moisture evaporate. If possible, position your fans near windows to help push out the humid air.

3. Use Dehumidifiers

In addition to fans, using a dehumidifier can help reduce humidity levels inside the home. This is a key step in drying out the air and preventing mold. Be sure to place the dehumidifier in the areas with the most moisture and empty the water collection bucket regularly.

4. Elevate Furniture and Valuables

Place furniture and valuables in a dry area or elevate them off the floor to prevent further water damage. Use blocks or aluminum foil under furniture legs to prevent water from soaking into the fabric or wood.

5. Dry Affected Materials

If carpets, rugs, or upholstery are wet, try to dry them as quickly as possible. You can use fans or place these items in a sunny area (if possible) to help them dry faster. However, be cautious, as some materials, like carpets or wood flooring, may need to be professionally treated to prevent further damage.

When to Call for Professional Flood Damage Restoration

While DIY methods can help mitigate the effects of minor flooding, professional help is essential for large-scale water damage. Professionals have access to the latest equipment and techniques to thoroughly dry out your home and prevent future problems. If the flooding is extensive or if mold begins to form, it’s important to call in a professional damage restoration service to handle the situation.

Summary

While household fans and dehumidifiers may seem like quick fixes for drying out flood-damaged areas, they are often insufficient for the complex task of restoring a home after a flood. To ensure that your property is dried thoroughly and safely, it’s best to call in professionals who specialize in damage restoration. By using industrial-grade equipment and advanced drying techniques, they can restore your home and prevent mold and other long-term issues.

Contact Us

If your home has been affected by flooding, don’t wait to take action. Our experienced team specializes in flood damage restoration near me and can help restore your property quickly and safely. Contact us today for a consultation and take the first step toward recovery.

FAQs About Flood Damage Drying

Q1: Why is drying out a flood-damaged home so important?

Proper drying is crucial to prevent mold, mildew, and structural damage. If not dried quickly, the moisture can compromise the integrity of your home and lead to long-term problems.

Q2: How long does it take to dry a flooded area?

The drying process can take anywhere from 2 to 7 days, depending on the extent of the flooding, the materials involved, and the drying equipment used. Professional services can significantly speed up the process.

Q3: Can I use a household fan to dry my carpet after a flood?

Household fans can help dry the surface of carpets, but they are often insufficient for deep drying. Professional drying equipment is necessary to prevent mold growth and restore your carpets properly.

Q4: Is it safe to use my flooded electronics after they dry?

No, it is never safe to use water-damaged electronics until they have been thoroughly inspected and professionally repaired. Water can cause long-term internal damage that may not be visible initially.

Published on: February 11, 2025

Your mattress plays a significant role in your overall health and well-being. It’s where you rest, recharge, and spend about one-third of your life. However, over time, mattresses accumulate dust, dead skin cells, allergens, and even bacteria. Regular Mattress Cleaning and disinfecting are essential to maintain a healthy and hygienic sleeping environment.

In this ultimate guide, we’ll walk you through how to clean and disinfect your mattress like a pro, ensuring it stays fresh, comfortable, and long-lasting.

Why Clean and Disinfect Your Mattress?

Mattresses are exposed to sweat, spills, dust mites, and allergens, making them prone to odors and potential health risks. Cleaning and disinfecting your mattress regularly:

  • Improves sleep quality by removing allergens and bacteria.
  • Extends the lifespan of your mattress by preventing wear and tear.
  • Promotes better hygiene and prevents unpleasant odors.

Step-by-Step Guide to Clean and Disinfect Your Mattress

Follow these professional steps to keep your mattress spotless and germ-free:

1. Strip the Bedding

Start by removing all bedding, including sheets, pillowcases, and mattress protectors. Wash these items in hot water with a mild detergent to kill germs, dust mites, and bacteria. Use fabric-specific instructions for delicate items to avoid damage.

2. Vacuum the Mattress

Vacuuming is the first step to remove loose dirt, dust, and allergens from the mattress surface. Use a vacuum cleaner with an upholstery attachment and focus on seams, edges, and crevices where debris tends to accumulate.

3. Spot Clean Stains

Accidental spills and stains are common, but tackling them quickly can prevent permanent damage. Here’s how to spot clean:

  1. Blot the Stain: Use a clean, dry cloth to blot the area and absorb as much liquid as possible. Avoid rubbing, as this can spread the stain.
  2. Apply a Cleaning Solution: Mix a few drops of mild detergent with water or use a vinegar-water solution. Dab the stained area gently with a soft cloth or sponge.
  3. Rinse and Dry: Use a damp cloth to remove any cleaning residue, then pat the area dry with a towel. Let the mattress air dry completely.

For tough stains or deep cleaning, search for Cheap Steam Cleaning for Mattresses Near Me for professional assistance.

4. Deodorize the Mattress

Eliminate odors naturally with baking soda. Sprinkle a generous amount over the entire surface of the mattress and let it sit for at least an hour. For stronger odors, leave the baking soda overnight. Vacuum thoroughly to remove the baking soda and enjoy a fresher-smelling mattress.

5. Disinfect the Mattress

Disinfecting is crucial to eliminate germs and bacteria. Here are some safe methods to disinfect your mattress:

  • Use a Disinfectant Spray: Lightly mist the mattress with a disinfectant spray designed for fabrics. Avoid over-saturating the mattress, as excess moisture can lead to mold growth.
  • Steam Cleaning: Steam cleaners are highly effective at killing bacteria, dust mites, and allergens. If you don’t own a steam cleaner, professional Mattress Cleaning services can provide deep cleaning with advanced equipment.
  • UV Light Sanitizer: For a chemical-free option, use a UV light sanitizer to kill bacteria and allergens on the mattress surface.

6. Air Out the Mattress

Proper ventilation is key to ensuring your mattress stays dry and mold-free. Place the mattress in a well-ventilated area or near an open window to air it out. If possible, leave it in indirect sunlight, as UV rays naturally kill bacteria and odors.

7. Protect Your Mattress

After cleaning and disinfecting, take preventive steps to maintain your mattress:

  • Use a Waterproof Mattress Protector: Protectors shield your mattress from spills, stains, and dust, making future cleaning much easier.
  • Wash Bedding Regularly: Clean your sheets and pillowcases weekly to prevent dirt and oils from transferring to the mattress.
  • Rotate or Flip the Mattress: Rotating your mattress every few months ensures even wear and extends its life.

When to Call in the Professionals

While regular maintenance can keep your mattress clean, some situations require professional help. If your mattress has persistent odors, deep stains, or hasn’t been cleaned in years, hiring experts for Mattress Cleaning is a smart choice.

How Often Should You Clean and Disinfect Your Mattress?

For a healthy sleeping environment, follow these guidelines:

  • Vacuum Monthly: Remove dust and allergens regularly.
  • Spot Clean as Needed: Address spills and stains promptly to prevent damage.
  • Deep Clean Twice a Year: Perform a deep clean and disinfection every six months or as needed.

Benefits of Regular Mattress Cleaning

  1. Healthier Sleep Environment: Reduce allergens, bacteria, and odors for a cleaner space.
  2. Improved Mattress Longevity: Proper care prevents wear and tear, saving you money in the long run.
  3. Better Sleep Quality: A fresh mattress promotes comfort and relaxation.

Conclusion

Cleaning and disinfecting your mattress doesn’t have to be a daunting task. With the right techniques and tools, you can easily maintain a fresh and hygienic sleeping space. From vacuuming and spot cleaning to deodorizing and disinfecting, these steps ensure your mattress stays in top-notch condition. And when in doubt, don’t hesitate to call in the professionals for Cheap Steam Cleaning for Mattresses for expert results at an affordable price.

Published on: February 10, 2025

Rugs add warmth, style, and personality to any room, but they also endure a lot of wear and tear. Dirt, stains, and odors can accumulate over time, making regular cleaning essential. One of the most effective ways to deep clean your rug and refresh its appearance is steam cleaning. This powerful method not only removes grime but also eliminates bacteria and allergens, leaving your rug spotless and hygienic.

In this guide, we’ll walk you through the process of steam cleaning your rug at home. Whether you’re a cleaning pro or a first-timer, these simple steps and tips will help you achieve professional-level results.

Why Steam Cleaning Is Effective

Steam cleaning uses high-temperature steam to penetrate deep into the rug fibers, breaking down dirt, stains, and odors. Unlike surface cleaning methods, steam cleaning provides a thorough, deep clean that revitalizes your rug’s texture and removes harmful allergens.

Some key benefits of steam cleaning include:

  1. Thorough Cleaning: Steam reaches deep into the fibers, removing embedded dirt and stains.
  2. Kills Bacteria and Allergens: High temperatures eliminate germs, dust mites, and allergens, promoting a healthier indoor environment.
  3. Eco-Friendly: Steam cleaning uses water and minimal chemicals, making it an environmentally friendly option.

Step-by-Step Guide to Steam Cleaning a Rug

Follow these simple steps to steam clean your rug effectively:

1. Prepare the Area

Before you start steam cleaning, prepare the area to ensure a smooth cleaning process.

  • Vacuum the Rug: Vacuum both sides of the rug to remove loose dirt, dust, and debris. This step prevents dirt from turning into mud when exposed to steam.
  • Move Furniture: Clear the surrounding area to avoid obstructions and ensure full access to the rug.

2. Spot Treat Stains

If your rug has visible stains, it’s important to address them before steam cleaning.

  • Use a gentle stain remover or a mixture of mild detergent and water.
  • Dab the stained area with a clean cloth—never rub, as this can spread the stain.
  • Let the area dry completely before proceeding with steam cleaning.

3. Choose the Right Steam Cleaner

Not all steam cleaners are created equal, so choose one that’s suitable for rugs.

  • Opt for a steam cleaner with adjustable settings and attachments designed for fabric cleaning.
  • Follow the manufacturer’s instructions to set up the machine and add water.

4. Test a Small Area First

Before cleaning the entire rug, test the steam cleaner on a small, inconspicuous area.

  • Check for any adverse reactions, such as color bleeding or damage to the fibers.
  • If the rug responds well, proceed with cleaning the rest of it.

5. Steam Clean the Rug

Now it’s time to get started with steam cleaning:

  • Begin at one corner of the rug and work your way across in straight lines.
  • Move the steam cleaner slowly to allow the steam to penetrate the fibers effectively.
  • Avoid over-saturating the rug, as excess moisture can lead to mold or mildew.

6. Dry the Rug Thoroughly

After steam cleaning, it’s crucial to dry your rug completely to prevent moisture-related issues.

  • Use fans or open windows to speed up the drying process.
  • Avoid placing the rug in direct sunlight, as this can cause fading or shrinkage.
  • Make sure the rug is fully dry before returning it to its original spot.

Tips for Effective Steam Cleaning

  1. Use Clean Water: Always fill the steam cleaner with fresh water for the best results.
  2. Avoid Harsh Chemicals: Steam cleaning typically doesn’t require strong chemicals—use a mild detergent if necessary.
  3. Regular Maintenance: Incorporate steam cleaning into your rug care routine every 6–12 months to keep it fresh and clean.

When to Call the Professionals

While steam cleaning is a great DIY solution, some rugs require professional attention.

  • Delicate Materials: Rugs made of silk, wool, or antique fabrics need specialized care.
  • Severe Stains: For tough stains or heavy soiling, professional cleaners have the tools and expertise to restore your rug.
  • Time Constraints: If you’re short on time, services offering rug steam cleaning in Adelaide can handle the job efficiently and effectively.

Benefits of Regular Steam Cleaning

  1. Improved Air Quality: Removing allergens and bacteria enhances your home’s air quality.
  2. Prolonged Rug Life: Deep cleaning helps maintain the rug’s texture, color, and durability.
  3. Enhanced Appearance: Steam cleaning restores the rug’s original vibrancy and freshness.

Common Mistakes to Avoid

  • Over-Saturating the Rug: Too much water can damage the fibers and backing.
  • Skipping the Vacuuming Step: Neglecting to vacuum beforehand can result in a less effective clean.
  • Using the Wrong Steam Cleaner: Always choose a machine suitable for rugs to avoid damage.

By avoiding these mistakes, you can achieve a spotless and fresh rug without any hassles.

Conclusion

Steam cleaning is one of the most effective ways to deep clean your rug and restore its beauty. By following these simple steps—preparing the area, spot-treating stains, choosing the right equipment, and drying thoroughly—you can keep your rug looking fresh and vibrant for years to come.

For delicate rugs or tougher cleaning challenges, professional rug steam cleanings an excellent option. With their expertise, your rug will receive the care it deserves, saving you time and effort.

Incorporate steam cleaning into your routine, and enjoy a spotless, allergen-free rug that enhances the comfort and aesthetics of your home.

Published on: February 8, 2025

Terrazzo floors are a stunning and durable choice for any home or commercial space. Made from a mix of marble, granite, quartz, and glass chips embedded in concrete, terrazzo floors offer a beautiful, unique finish. However, like all flooring, terrazzo requires proper care and maintenance to keep it looking its best. Regular cleaning not only keeps your terrazzo floors shining but also helps to prolong their life and maintain their beauty.

Why Clean Terrazzo Floors Regularly?

Terrazzo floors, while durable, are still prone to dirt, stains, and scratches if not maintained properly. Cleaning them regularly helps:

  • Prevent Stains: Terrazzo is porous and can absorb liquids, leading to stains if not cleaned up quickly.
  • Maintain Shine: Regular cleaning removes dirt and grime that can dull the floor’s glossy surface.
  • Prolong Durability: Proper maintenance ensures the floor stays in top condition and extends its lifespan.

Tools and Materials You’ll Need

Before cleaning your terrazzo floors, gather the following materials:

  • Soft Mop or Microfiber Cloth: For wiping down surfaces without scratching.
  • pH-Neutral Cleaner: A cleaner safe for terrazzo floors that won’t damage the surface.
  • Bucket of Warm Water: For rinsing the floor.
  • Soft-Bristle Brush: For cleaning grout lines and corners.
  • Dry Microfiber Cloth: To dry the floor after cleaning.
  • Stone Sealer (Optional): To protect the surface from stains and damage.

Step-by-Step Guide to Cleaning Terrazzo Floors

1. Sweep or Vacuum the Floor

  • Begin by sweeping or vacuuming your terrazzo floor to remove dirt, dust, and debris. This prevents grit from scratching the surface during cleaning.
  • Use a soft brush attachment on your vacuum to avoid damaging the floor.

2. Prepare the Cleaning Solution

  • Mix a small amount of pH-neutral cleaner with warm water in a bucket. Avoid using acidic cleaners like vinegar or bleach, as they can damage the terrazzo surface.
  • Always check the manufacturer’s instructions for your specific floor type and cleaner.

3. Mop the Floor

  • Dip your mop or microfiber cloth into the cleaning solution and wring it out until it’s damp (not soaking). Mop the terrazzo floor in small sections, working from one side of the room to the other.
  • Use gentle, circular motions to clean the floor and avoid scrubbing too hard, which could cause damage.

4. Clean Grout Lines and Corners

  • Terrazzo floors often have grout lines that can accumulate dirt and grime. Use a soft-bristle brush dipped in the cleaning solution to scrub the grout and corners where the mop can’t reach.
  • Be careful not to use too much water around the grout, as it can seep into the lines and cause damage over time.

5. Rinse the Floor

  • After mopping, rinse the floor with clean water to remove any cleaning solution residue. Use a clean mop or cloth to wipe the surface.
  • Make sure no cleaning product is left behind, as it can cause streaks or a sticky residue.

6. Dry the Floor

  • Use a dry microfiber cloth to buff the floor and remove any remaining moisture. This step ensures the floor doesn’t develop water spots or streaks.
  • It also helps to restore the shine after cleaning.

7. Apply Stone Sealer (Optional)

  • If you want to add an extra layer of protection, consider applying a stone sealer to your terrazzo floor after cleaning. Sealing helps prevent stains, moisture, and dirt from penetrating the surface.
  • Follow the manufacturer’s instructions for the sealer and allow it to cure before using the floor.

Tips for Maintaining Your Terrazzo Floors

  1. Wipe Spills Immediately
    • Terrazzo is porous, so spills should be wiped up immediately to prevent staining. Especially with liquids like coffee, wine, or oil, it’s essential to clean spills as soon as they happen.
  2. Use Mats and Rugs
    • Place mats at entryways and in high-traffic areas to reduce the amount of dirt and debris that comes into contact with your terrazzo floors.
  3. Avoid Abrasive Cleaners
    • Never use abrasive scrubbing pads or harsh chemicals that can scratch or damage the surface. Stick to pH-neutral cleaners designed for terrazzo.
  4. Regular Sweeping and Mopping
    • Sweep or vacuum regularly to keep dirt and grit from scratching the surface. Mop your floors weekly to maintain their cleanliness and shine.
  5. Reseal Periodically
    • Reapply a stone sealer every 1-2 years, depending on the level of foot traffic and exposure to moisture. Sealing helps protect your terrazzo floors and keeps them looking new.

When to Call the Pros

While regular cleaning and maintenance can keep your terrazzo floors in great shape, there are times when you may need professional assistance. If your floors have deep stains, damage, or require same day tile cleaning, a professional service can restore them to their original beauty. Experts have the right tools and experience to tackle tough problems and provide a thorough cleaning that will extend the life of your floors.

Conclusion

Cleaning terrazzo floors is easy when you use the right tools and techniques. By following these steps and maintaining your floors regularly, you can ensure they stay looking beautiful for years to come. Whether it’s routine cleaning or dealing with more stubborn stains, keeping your terrazzo floors in top condition is key. For more extensive cleaning or maintenance, don’t hesitate to call for same day tile cleaning services to get your floors looking pristine again.

Published on: January 31, 2025

Carpets are an essential part of a cozy and comfortable home. They add warmth, enhance the aesthetic appeal, and provide a soft surface to walk on. However, without proper maintenance, carpets can accumulate dust, allergens, and bacteria, which may pose health risks. Regular upkeep and timely repairs not only extend the life of your carpet but also contribute to a healthier indoor environment.

Importance of Carpet Maintenance

Carpets act as a filter, trapping dust, dirt, and pollutants that enter your home. Over time, these contaminants build up and can affect indoor air quality. Regular carpet cleaning is essential to remove allergens and maintain hygiene. Here’s why proper maintenance is crucial:

  1. Improved Indoor Air Quality
    Dust, pollen, pet dander, and other allergens settle into carpets, affecting the air you breathe. Routine cleaning reduces these pollutants, leading to better air quality and fewer respiratory issues.
  2. Prolongs Carpet Life
    Regular vacuuming and deep cleaning prevent dirt from embedding into carpet fibers, which can cause premature wear and tear. Maintaining your carpets helps preserve their texture and color for years.
  3. Eliminates Bacteria and Mold Growth
    Spills and humidity can create an environment where mold and bacteria thrive. Proper carpet maintenance, including drying and disinfecting, prevents the growth of harmful microorganisms.
  4. Enhances Aesthetic Appeal
    A clean, well-maintained carpet makes a significant difference in the overall appearance of your home. It keeps your interiors looking fresh and inviting.

Why Carpet Repair is Just as Important

Even with the best care, carpets experience wear and tear over time. Small damages, if ignored, can lead to bigger issues that may require complete replacement. Professional repair services address these concerns efficiently.

Benefits of Timely Carpet Repair

  • Prevents Further Damage: Small tears and loose fibers can worsen if left unattended. Repairing them early helps in maintaining structural integrity.
  • Saves Money: Repairing carpets is far more cost-effective than replacing them entirely. Fixing minor damages can extend their usability.
  • Restores Comfort and Safety: Damaged carpets with wrinkles or tears pose a tripping hazard. Repairing these issues ensures a safer living space.
  • Enhances Home Value: Well-maintained carpets contribute to the overall value of your property, making it more appealing to potential buyers or tenants.

Common Carpet Problems & How to Fix Them

  1. Wrinkles and Buckling
    Heavy furniture and improper installation can cause ripples in the carpet. Stretching and reinstallation resolve this issue.
  2. Stains and Spills
    Immediate blotting and deep carpet cleaning prevent permanent stains. Professional cleaning services can remove stubborn spots.
  3. Tears and Holes
    Small tears can be patched or re-seamed by professionals to restore the carpet’s original look.
  4. Burn Marks
    Cigarette burns or iron marks can be fixed using patching techniques, blending in seamlessly with the existing fibers.
  5. Water Damage
    Excess moisture can lead to mold and mildew growth. Drying, cleaning, and deodorizing help restore carpets affected by water damage.

How Professional Services Make a Difference

DIY cleaning and repair methods can only do so much. Hiring experts ensures deep cleaning and precise repairs that prolong the life of your carpets. Carpet Damage Repair Experts in Adelaide provide professional solutions to tackle stubborn stains, extensive wear, and structural damage. Their specialized techniques ensure your carpets remain in top condition.

Tips to Maintain Carpets at Home

  1. Vacuum Regularly – Aim to vacuum at least twice a week to prevent dirt buildup.
  2. Use Doormats – Placing mats at entrances reduces the amount of dirt brought into your home.
  3. Clean Spills Immediately – Blot stains with a clean cloth instead of rubbing to prevent further spread.
  4. Rotate Furniture – Changing furniture placement prevents excessive wear in specific areas.
  5. Schedule Professional Cleaning – Deep carpet cleaning every 6–12 months ensures thorough removal of dirt and bacteria.

Conclusion

Carpets play a crucial role in making your home comfortable and visually appealing. However, neglecting maintenance and repairs can lead to poor indoor air quality, potential health risks, and premature wear. Regular cleaning, timely repairs, and professional services help in maintaining a fresh and safe environment. By investing in proper care, you ensure that your carpets remain a long-lasting asset in your home.

Published on: January 29, 2025

Carpets bring comfort and style to your home, but they also accumulate dirt, allergens, and stains over time. Regular carpet cleaning is essential for maintaining their appearance and prolonging their lifespan. But how often should you clean your carpets? The answer depends on various factors, including foot traffic, household members, and the type of carpet you have. Let’s explore how often you should clean your carpets and why a cleaning schedule is vital for a healthy home environment.

1. Why Regular Cleaning of Carpets Is Important

Carpets trap dust, dirt, allergens, and bacteria, which can affect indoor air quality and cause wear on the fibres. Regular cleaning helps:

  • Maintain Appearance: Removes stains and refreshes the look of your carpet.
  • Extend Lifespan: Prevents dirt and debris from breaking down fibres.
  • Improve Air Quality: Reduces allergens like dust mites, pollen, and pet dander.
  • Enhance Hygiene: Removes bacteria, mould spores, and odours.

2. General Cleaning Recommendations

The frequency of carpet cleaning depends on how heavily your carpets are used. Here are general guidelines:

a. Low-Traffic Homes

If your home has minimal foot traffic and no pets or children, a professional cleaning every 12–18 months is sufficient. Regular vacuuming once a week will help maintain cleanliness.

b. Moderate-Traffic Homes

For homes with moderate traffic, such as small families or those with occasional visitors, it’s recommended to clean carpets professionally every 6–12 months. Vacuuming at least twice a week can keep dirt and dust at bay.

c. High-Traffic Homes

In busy households with kids, pets, or frequent guests, carpets should be professionally cleaned every 3–6 months. High-traffic areas like hallways, living rooms, and entryways may need extra attention.

3. Factors That Influence Cleaning Frequency

a. Pets

Pets can contribute to dirt, fur, and accidents that soil carpets. Regular vacuuming and professional cleaning every 3–6 months help manage these issues.

b. Children

Kids often track in dirt, spill food, and create stains on carpets. For families with children, professional cleaning every 6 months is advisable.

c. Allergies or Respiratory Issues

If someone in your household suffers from allergies or asthma, more frequent cleaning of carpets can improve air quality and reduce allergens. Aim for professional cleaning every 4–6 months.

d. Type of Carpet

Some carpet materials, such as wool or shag, require more frequent cleaning due to their fibre composition and ability to trap dirt. Check with your carpet manufacturer for specific care instructions.

4. DIY vs. Professional Carpet Cleaning

While regular vacuuming and spot cleaning are important, they don’t replace professional cleaning. Here’s why professional services are essential:

  • Deeper Clean: Professionals use advanced equipment to remove dirt and allergens embedded deep within the fibres.
  • Stain Removal: Tough stains that household cleaners can’t handle are treated effectively.
  • Safe Techniques: Experts use methods tailored to your carpet type, ensuring a thorough clean without damage.

5. How to Maintain Your Carpet Between Professional Cleanings

To keep your carpet in top condition between professional cleanings, follow these tips:

  • Vacuum Regularly: Remove dirt and debris at least once or twice a week.
  • Use Mats and Rugs: Place rugs in high-traffic areas to reduce wear on carpets.
  • Spot Clean Spills Promptly: Blot spills immediately with a clean cloth and use a mild cleaning solution.
  • Enforce a No-Shoes Policy: Prevent dirt from being tracked onto carpets by asking family members and guests to remove their shoes.

Contact Us for Expert Services

At We Do Carpet Cleaning, we provide professional cleaning services tailored to your needs. Our team uses advanced techniques and eco-friendly products to deliver a deep clean that enhances the beauty and longevity of your carpets.

find us today by Same-day Carpet Cleaning Near Me to schedule your next cleaning and enjoy a healthier, fresher home!

Conclusion

The frequency of carpet cleaning depends on various factors, including traffic levels, pets, children, and allergies. While low-traffic homes may need professional cleaning every 12–18 months, high-traffic households require cleaning every 3–6 months. Regular vacuuming, prompt spot cleaning, and using rugs or mats can help maintain your carpet between professional services. For the deepest clean and to extend your carpet’s life, rely on expert services.

FAQs About Carpet Cleaning Frequency

1. How often should I clean my carpets if I have pets?

Homes with pets should have carpets professionally cleaned every 3–6 months to manage fur, dander, and accidents.

2. Can I wait longer between professional cleanings if I vacuum regularly?

Regular vacuuming helps maintain your carpet but doesn’t replace the need for deep cleaning to remove embedded dirt and allergens.

3. Are there any risks to over-cleaning my carpet?

Over-cleaning with improper techniques or harsh chemicals can damage carpet fibres. Stick to professional services for safe and effective results.

Published on: January 28, 2025

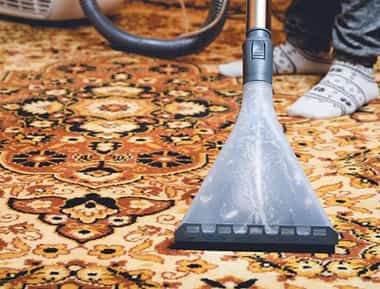
Keep Your Tiles And Grout Clean With Our Sandilands Teams’ Cleaning Help

We do Carpet Cleaning is a strong believer in adopting the approved and safe method when cleaning tiles and grout. When you call us for emergency tile grout cleaning Sandilands service, we dispatch our cleaners to reach out to you in less than 24 working hours. This is because we do not want our clients to be in dire situations anymore where they are unable to get rid of mould and stains on their tiles. You’ll be surprised that all of our tile and grout cleaning Sandilands experts are well-certified with various legal certifications.

Tile cleaning Sandilands work is not an easy job when you want the floors and walls to shine brightly if you do not have the required equipment. However, our professional tile cleaning teams that are licensed exclusively have an inventory for storing cleaning equipment. The equipment we use for Sandilands tile and grout cleaning services are no doubt the best ones you can find in the drive. With our help in tile and grout cleaning for your place, we make your experience an absolutely delightful one. Therefore, contact 0488 851 508.

    Bag Our Deals For The Tile Cleaning In Lounge, Dining, Hall And Kitchen Areas

    Team tile and grout cleaning Sandilands have selected experts, who are not just good at what we are supposed to do but know additionals as well. For suppose, depending on the tile type and determining the level of cleaning it needs, we customise different tile cleaning Sandilands methods. As a result, you get to bag a wide range of deals for Sandilands tile and grout cleaning services when you contact and hire our cleaners.

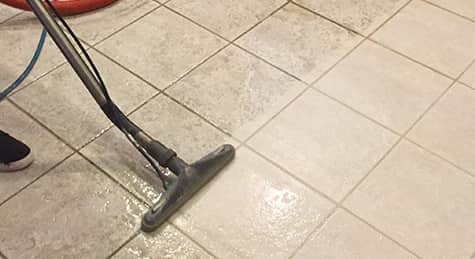
    Bathrooms Floors And Walls Tile Cleaning

    For places like bathrooms, we use pressure washers to do a thorough cleaning despite the dirt. In fact, many Sandilands residents are extremely satisfied with the way we clean floors and the walls of bathrooms.

    Showers Tile Cleaning

    The best solution to get rid of mould from tiles in showers is to first clean and then proceed to disinfect. Hence, we follow this procedure and make your shower tiles free of mould.

    Kitchen Floors And Walls Tile Cleaning

    One of the common areas of the home you find stains and many accidental spills is the kitchen. However, we can tackle this situation for you by offering same-day Sandilands tile and grout cleaning services.

    Any Floor Or Wall Tiles Throughout The House

    In addition to the above-mentioned area of your house, we clean tiles in other areas as well. You can count on us for cleaning tiles throughout your house and the areas are.

    • Fireplace
    • Bar area
    • Swimming pool
    • Entryway
    • Mudroom, and so on and so forth.
    Call to our Experts 0488 851 508

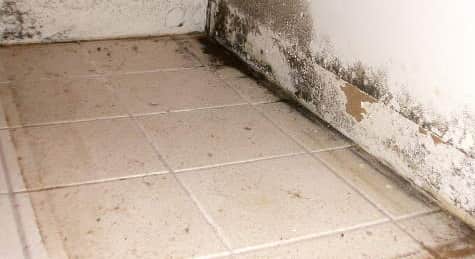
    Special Mildew And Mould Treatment For Your Floor And Wall Tiles

    Our talent is immense when coming to mildew and mould treatment for your tiles and grout be it for porcelain tiles or any other type. First, we inspect the tiles to find the reasons causing mould and mildew growth to provide necessary cleaning methods. For suppose, mould growth because of pet urine is treated differently from mould growth because of excess stains. This goes the same for the growth of mildew. Hence, contact tile and grout cleaning Sandilands cleaners today!

    Special Mildew And Mould Treatment

    A Licensed Team In Sandilands For Professional Cleaning & Sealing Of Tiles

    While recruiting tile and grout cleaners, we make sure to verify their background thoroughly along with the license they carry. License for Sandilands tile and grout cleaning services proves our ability to give superior results and splendid performance. We also strive to deliver in-time tile cleaning Sandilands service that lasts long by giving deeper cleaning. As licensed tile cleaners, we also ensure to use cleaning solutions that don’t consist of chemical and non-toxic innards. Therefore, feel free to call for enquiries as well as booking slots!

    Professional Cleaning

    Resolve Any Of Your Everyday Tile And Grout Problems

    There are a variety of tile and grout problems your home gets to experience every other day in spite of looking and taking care of them. Fortunately, you have our tile and grout cleaning Sandilands team to count on for resolving your everyday issues with tiles & grout.

    #
    Efflorescence

    Despite you cleaning your floor and wall tiles, you still find white, crystalline-like forms in your grout. This is nothing but efflorescence that gathers in between any two tiles over the long run.

    Gap In Grouts
    Gap In Grouts

    Grout is porous in nature and a great absorber of stains, spills and spots in addition to dirt and debris. And this makes one of the reasons for the formation of gas in the grout.

    Loose Sealing
    Loose Sealing

    You notice your tiles coming out of their original place and this is because of loose sealing. Loose sealing happens either because of improper installation or different other reasons.

    Stain
    Stain

    One stain on tiles and grout outnumbers another when you neglect their presence. In fact, these stains are capable of making your tiles and grout lose their glory nonetheless.

    Call to our Experts 0488 851 508

    Covers Northern, Southern, Eastern & Western Suburbs Of Sandilands, Including The CBD

    No way are we just going to offer our Sandilands tile and grout cleaning services to Sandilands itself. Because we have various tile and grout cleaning Sandilands teams in and around the city to cover its suburbs as well. We are likely to be available for residents of Sandilands suburbs from North, South, East and West for reasonable prices. As regular cleaning of tiles help them be in good condition and healthy, we are available for emergency bookings as well. In fact, for any local that contacts us from Sandilands suburbs, we take even last-minute appointments. We serve CBD as well!

    Tile And Grout Cleaning Sandilands

    An Ideal Tile And Grout Cleaning Sandilands Team That Meets Your Needs

    We make sure to meet all your needs when it comes to tile and grout cleaning Sandilands services as the end results bring a smile to your face. Our grout cleaning company is bent on doing the tile cleaning in different ways by following the below measures:

    Cleaning According
    Cleaning According To Condition

    Not every cleaning agent is useful for different kinds of tile and grout issues and needs necessary products. Hence, we instead focus on using those products that are chemical-free to clean tiles according to their conditions.

    We Clean All Tiles
    We Clean All Tiles

    Regardless of the tile type at your place, we are a tile cleaning Sandilands team that is readily available for cleaning. We clean a gallery of tiles such as the following:

    1. Ceramic tiles
    2. Porcelain tiles
    3. Marble tiles
    4. Granite tiles
    5. Quartz tiles
    6. Terracotta tiles and many more.
    Special Treatment For Moulds
    Special Treatment For Moulds

    We offer a special treatment for moulds that prevents the discolouration of your tiles. Our tile grout cleaning Sandilands service leaves your tiles deeply cleaned with zero mould post our help.

    Restorative Cleaning
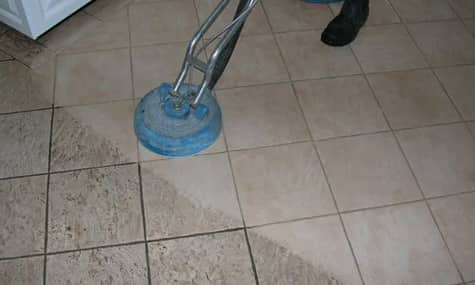
    Restorative Cleaning Available

    Also, we do restorative cleaning with the tile steam cleaning service and regain the original glory of your tiles. Because this helps your tiles last longer and increases their durability to all kinds of accidents. .

    Certified Tile Cleaning Team
    Certified Tile Cleaning Team

    As an experienced team that recruits skilled tile cleaners, we make sure to hire only the verified and certified ones. Certifications we hold are IICRC, SMT, etc.

    FAQs

    Yes. Because, like rugs, carpets and upholstery items in your home, the tiles and grout are bound to build up dirt and dull stains over time. This leads to discolouration of your tiles and makes them appear worn out. But if you go for professional tile cleaning regularly, you can reverse this situation in the fastest way possible.

    To know the exact frequency of how often you should get your tiles cleaned, there are many factors to determine it. The factors can be kids, pets, high foot traffic, routine floor maintenance, etc. So, contact a professional tile and grout cleaning Sandilands company like us for enquiries and services.

    Sure signs that show your place needs professional tile and grout cleaning services are,

    • Shading of colours on your tiles
    • Dullness in their appearance
    • Sections of spills and mould everywhere on tiles
    • Presence of efflorescence
    • Loose stealing, etc.

    Regardless of the tile type, the cost for tile grout cleaning Sandilands service depends on the condition of the tiles and the cleaning methods to be adopted. Sometimes, the cost of cleaning a square foot of ceramic tile depends on the customised Sandilands tile and grout cleaning services.

    Reasons, why an expert should clean your tile, are below:

    • Saves your time, energy and from the hassle
    • Professionals in getting rid of deeply-embedded dirt
    • Use protective sealants and
    • Makes the indoor environment healthier.

    Published on: September 26, 2022